Authentication
Every API request in Curlex can have its own authentication configuration, or it can inherit auth from its parent collection — meaning you configure it once and every request inside automatically uses it.
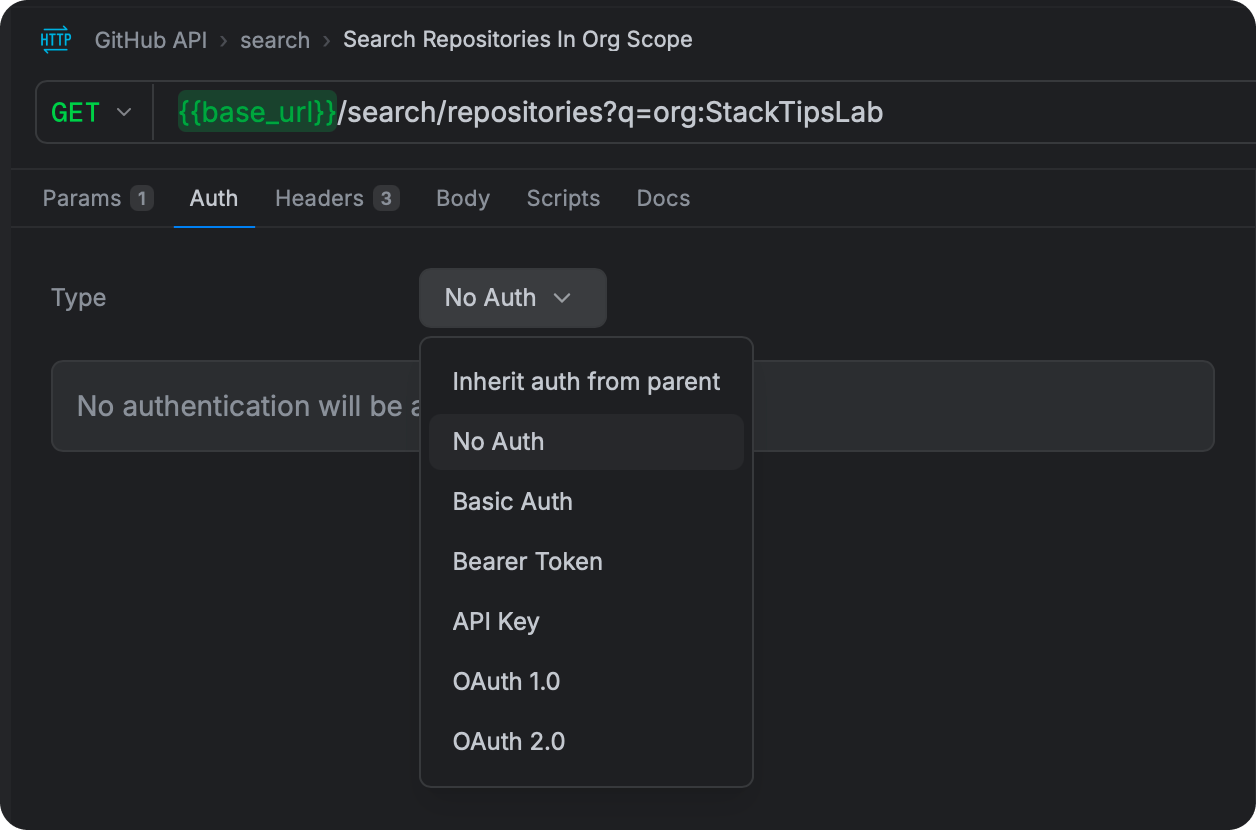
The Auth tab in any request handles all of this. Curlex builds the correct header or query parameter for each auth type automatically — you fill in your credentials, and Curlex handles the rest.
Quick Reference
| Auth Type | What you need | Where Curlex puts it |
|---|---|---|
| None | Nothing | Nothing |
| Inherit | Nothing (uses collection's auth) | Depends on collection |
| Basic | Username + Password | Authorization: Basic <base64> header |
| Bearer | Token string | Authorization: Bearer <token> header |
| API Key | Key name + value | Header or query parameter (your choice) |
| OAuth 1.0 | Consumer Key/Secret + Access Token/Secret + signature method | Authorization: OAuth <signature> header |
| OAuth 2.0 (token) | Access token | Authorization: Bearer <token> header (or custom prefix) |
| OAuth 2.0 (flow) | Client ID + flow-specific fields | Obtained automatically, then sent as Bearer |
How Inheritance Works
The most efficient way to manage auth is to set it on the collection, not on every individual request.
Open your collection (click on its name in the sidebar, then look for the Auth tab), configure your auth there, and then make sure each request inside is set to Inherit. When you rotate a token or update credentials, you change them in one place and every request in the collection picks up the change instantly.
When to set auth per-request instead:
- A single request in a collection uses a different auth scheme than the rest.
- You are testing with different credentials on a specific endpoint.
- One request is public (None) inside a collection that otherwise requires auth.
None
No authentication header or parameter is added to the request. Use this for public endpoints — health checks, public read endpoints, or APIs that do not require credentials.
Inherit
The request uses the authentication configured on its parent collection or folder. This is the default for new requests and the recommended setting in most cases.
If the collection has no auth configured, Inherit effectively means no auth.
Basic Authentication
Basic Auth sends your username and password with every request, encoded as Base64. It is one of the oldest HTTP authentication schemes and is still used by many internal tools, webhooks, and legacy APIs.

Fields:
| Field | Description |
|---|---|
| Username | Your username. Supports {{variable}} substitution. |
| Password | Your password. The input is masked by default. Supports {{variable}} substitution. |
What Curlex sends:
Authorization: Basic dXNlcm5hbWU6cGFzc3dvcmQ=
The value after Basic is username:password encoded in Base64. Curlex performs this encoding automatically.
Security note: Base64 is encoding, not encryption. Anyone who intercepts the request can decode it instantly. Always use Basic Auth over HTTPS, never over plain HTTP.
Tip: Store your password in an environment variable (marked as Secret) and use {{password}} in the Password field. This keeps your actual credentials out of your collection files.
Bearer Token
Bearer Token is the most common auth scheme for modern APIs. You provide a token — typically a JWT or an OAuth 2.0 access token — and Curlex sends it in the Authorization header.
Fields:
| Field | Description |
|---|---|
| Token | The token value. The field accepts multi-line input (useful for long JWTs). The visibility can be toggled. |
What Curlex sends:
Authorization: Bearer eyJhbGciOiJIUzI1NiIsInR5cCI6IkpXVCJ9...
When to use this vs OAuth 2.0:
- If you already have a token (copied from another tool, from a sign-in response, or from your app's config), use Bearer Token — paste it and go.
- If you need Curlex to obtain a token by running a login flow against an auth server, use the full OAuth 2.0 configuration described below.
API Key
Some APIs use a custom header name or a URL query parameter for authentication instead of the standard Authorization header.
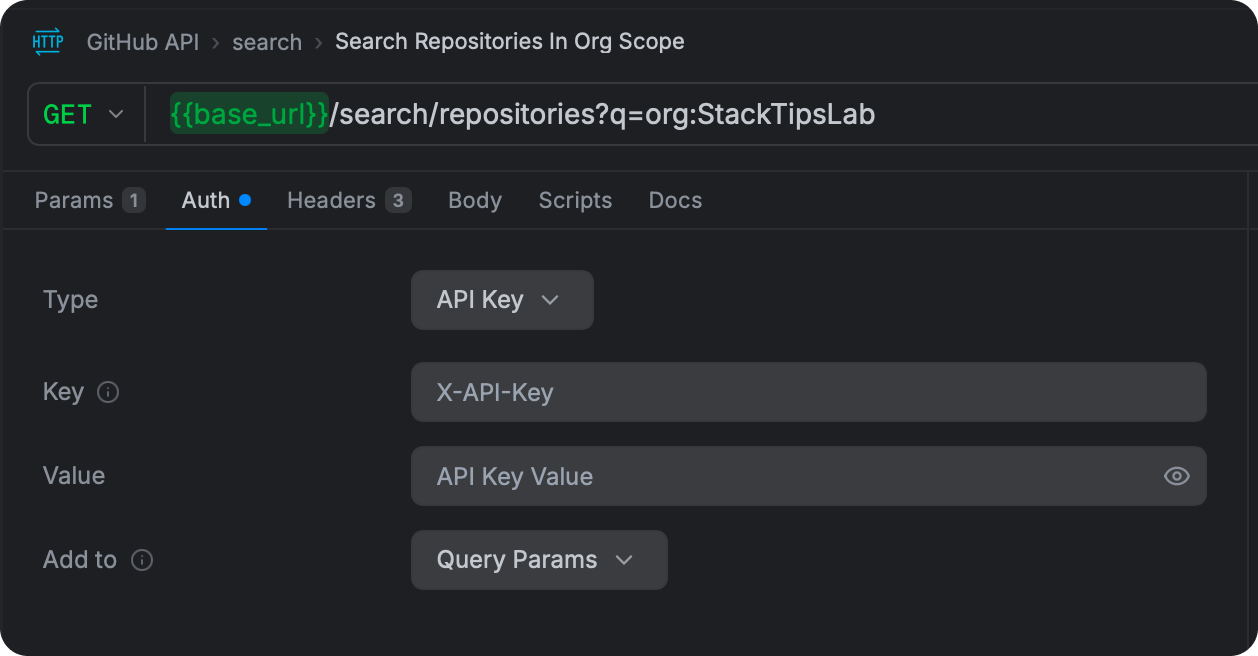
Fields:
| Field | Description |
|---|---|
| Key | The header name or query parameter name — e.g. X-API-Key, api_key, token |
| Value | The API key value. The field is masked by default. |
| Add to | Header sends it as a request header. Query Params appends it to the URL. |
Example — Header placement:
X-API-Key: sk-live-abc123...
Example — Query parameter placement:
https://api.example.com/data?api_key=sk-live-abc123...
Use whichever placement the API's documentation specifies.
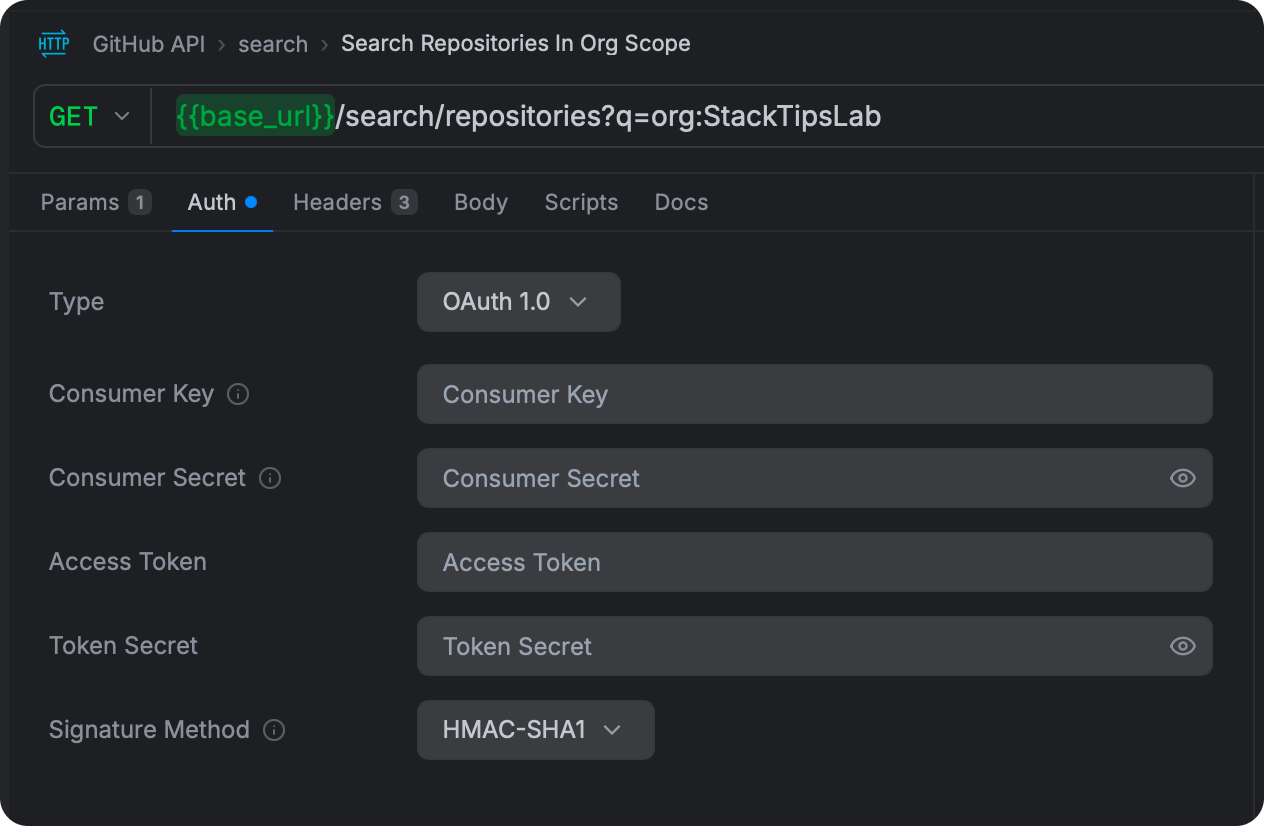
OAuth 1.0
OAuth 1.0 is an older standard that is still used by some APIs — notably Twitter's legacy API, Flickr, and some payment gateways. It works by cryptographically signing each request using your credentials, so even if the request is intercepted, the signature cannot be reused.

Fields:
| Field | Description |
|---|---|
| Consumer Key | The public identifier for your application, issued when you registered with the API provider |
| Consumer Secret | The secret that pairs with your Consumer Key — keep this private |
| Access Token | The token that represents the user who authorised your app |
| Token Secret | The secret that pairs with the Access Token |
| Signature Method | How to compute the signature — see below |
Signature Methods:
| Method | When to use it |
|---|---|
| HMAC-SHA1 | The most widely supported. Use this unless the API documentation says otherwise. |
| HMAC-SHA256 | A more secure option supported by some newer OAuth 1.0 implementations. |
| PLAINTEXT | The credentials are sent without cryptographic signing. Only appropriate when the connection itself is already secured (HTTPS). |
Curlex handles all the OAuth 1.0a signature computation — building the base string, applying percent-encoding per RFC 3986, computing the HMAC, and formatting the Authorization header — automatically from the values you provide.
OAuth 2.0
OAuth 2.0 is the modern standard used by Google, GitHub, Stripe, Salesforce, Microsoft, and most major APIs. It involves your app obtaining an access token from an authorisation server, then using that token to authenticate API requests.
Curlex supports the full OAuth 2.0 flow directly — you do not need to obtain a token externally or paste it in manually. Configure your credentials, click Get Access Token, and Curlex handles the browser redirect, code exchange, and token storage for you.
Two Ways to Use OAuth 2.0
Option A — Paste an existing token (simple): If you already have an access token, select OAuth 2.0 from the auth type dropdown, and you will see three fields:
| Field | Description |
|---|---|
| Access Token | Paste the token directly. The field is masked and toggleable. |
| Token Type | Bearer (default) or MAC |
| Header Prefix | The prefix before the token in the Authorization header. Defaults to the Token Type (usually Bearer). Change this only if an API uses a non-standard prefix. |
Option B — Run a full OAuth 2.0 flow (recommended): Click Configure OAuth 2.0 Flow (or the flow setup button) to open the full OAuth 2.0 configuration. This is described in detail below.
OAuth 2.0 Grant Types
Curlex supports all five standard OAuth 2.0 grant types. Which one you use depends on what the API requires and the kind of application you are building.
Authorization Code
The standard server-side flow. The user is redirected to the auth server, approves access, and is sent back to your app with an authorisation code that Curlex exchanges for tokens.
Use when: The API documentation says "Authorization Code flow" and you have a client secret.
Fields required:
| Field | Description |
|---|---|
| Token Name | A label to identify this token — useful when you store multiple tokens |
| Auth URL | The URL where users are sent to log in and approve access (e.g. https://accounts.google.com/o/oauth2/auth) |
| Access Token URL | The URL Curlex calls to exchange the authorisation code for tokens (e.g. https://oauth2.googleapis.com/token) |
| Client ID | Your application's public identifier |
| Client Secret | Your application's private secret |
| Callback URL | Where the auth server sends the user after they approve. Default: https://localhost/callback. This must exactly match what you registered with the API provider. |
| Scope | Space-separated list of permissions to request (e.g. read:user repo) |
| Client Authentication | How to send your credentials to the token endpoint — either as a Basic Auth header or as fields in the request body |
What happens when you click "Get Access Token":
- Curlex builds the authorisation URL with your client ID, redirect URI, scope, and a randomly generated
statevalue for CSRF protection. - A popup window opens pointing to the auth server's login page.
- You log in and approve the requested permissions.
- The auth server redirects to your Callback URL with a
codeparameter. - Curlex intercepts the redirect, validates the
statematches, and immediately closes the popup. - Curlex calls your Access Token URL to exchange the code for an access token and refresh token.
- The token is stored and displayed in the form.
Authorization Code with PKCE
The PKCE (Proof Key for Code Exchange, pronounced "pixie") variant of the Authorization Code flow is designed for applications that cannot safely store a client secret — mobile apps, single-page web apps, and desktop apps. Instead of a client secret, it uses a cryptographic challenge.
Use when: The API documentation mentions PKCE, or you are building a public client (no server side).
Fields required: Same as Authorization Code, except:
- Client Secret is not required (leave blank)
- Challenge Method replaces the client secret:
| Method | Description |
|---|---|
| S256 | The recommended method. Curlex generates a random 64-character code verifier, computes its SHA-256 hash, and sends the hash as the challenge. The verifier is sent during code exchange for the token server to verify. |
| Plain | The code verifier and challenge are the same value. Only use this if the auth server does not support S256. |
What happens:
- Curlex generates a cryptographically random code verifier (64 URL-safe characters).
- For S256: Curlex hashes the verifier with SHA-256 and Base64URL-encodes it to produce the code challenge.
- The challenge is included in the authorisation URL.
- After you approve, Curlex sends the original verifier (not the hash) during code exchange. The server independently hashes it and verifies it matches the challenge — proving the token request came from the same party that started the flow.
Client Credentials
A server-to-server flow. No user is involved — your application authenticates directly with the API using its client ID and secret. The auth server returns an access token immediately.
Use when: Your code (a backend service, a script, a CI pipeline) needs to call an API without a user being present.
Fields required:
| Field | Description |
|---|---|
| Access Token URL | The token endpoint |
| Client ID | Your application's identifier |
| Client Secret | Your application's secret |
| Scope | Optional permissions to request |
| Client Authentication | Basic Auth header or credentials in request body |
What happens: Curlex sends a direct POST request to the Access Token URL with your credentials and grant type. The token is returned immediately with no browser redirect.
Automatic token renewal: Unlike other grant types, Client Credentials tokens typically do not come with a refresh token. When your token expires, Curlex automatically requests a fresh one using your stored credentials — you do not need to manually click "Get Access Token" again. This happens transparently every time you send a request with an expired token.
Password (Resource Owner Password Credentials)
A legacy flow where the user's username and password are sent directly to the token endpoint. The auth server verifies the credentials and returns tokens.
Use when: An older API specifically requires this flow. It is not recommended for new integrations — the Authorization Code flow is safer because your app never sees the user's password.
Fields required:
| Field | Description |
|---|---|
| Access Token URL | The token endpoint |
| Client ID | Your application's identifier |
| Client Secret | Optional — some providers require it, some do not |
| Username | The resource owner's username |
| Password | The resource owner's password |
| Scope | Optional |
Implicit
A legacy browser-based flow where the access token is returned directly in the URL fragment after the redirect, without a code exchange step. It has been largely replaced by Authorization Code + PKCE and is not recommended for new integrations.
Use when: An older API only supports Implicit flow and you cannot use PKCE.
Fields required: Auth URL, Client ID, Callback URL, Scope. No Access Token URL or Client Secret needed.
What happens: Curlex opens the authorisation URL in a popup. After approval, the access token arrives in the URL fragment (#access_token=...). Curlex parses it directly from the redirect URL.
Managing Tokens
Once you have obtained a token, it is displayed in the form with these details:
- Access Token — the token value, masked by default (click the eye icon to reveal)
- Refresh Token — available when the provider issued one
- Expires At — when the token expires, shown as a timestamp and as a human-readable countdown
- Token Type — typically
Bearer - Status — Active (green) when the token is valid, Expired (red) when it has passed its expiry with a 30-second buffer
Refreshing a token: When a refresh token is available, a Refresh Token button appears. Click it to obtain a new access token without going through the full authorisation flow again. This works for any grant type that issues a refresh token.
For Client Credentials, Curlex handles this automatically — when the token expires, a fresh one is obtained before your next request is sent, without any manual action.
Getting a new token: If a token has expired and no refresh token is available, click Get Access Token to restart the flow from the beginning.
Inspecting a token (JWT Decode): If your access token is a JWT (JSON Web Token), you can inspect its contents without leaving Curlex. Click Decode JWT below the token display to see the token's header (which shows the signing algorithm) and payload (which contains your claims, scopes, expiry, and other information the auth server embedded). This is helpful when troubleshooting permission errors — you can quickly check whether the token contains the scopes you expected.
If the token is not a JWT (some providers issue opaque tokens that are just random strings), Curlex will let you know.
Token History: Every time you obtain a new token, the previous one is saved automatically. Click Token History to see up to five recent tokens, each showing when it was fetched and whether it has since expired. You can click Use next to any previous token to restore it — useful when you need to compare behaviour between an old and new token, or when a newly issued token is not working as expected and you want to fall back to the previous one.
OAuth 2.0 Advanced Options
Client Authentication controls how Curlex sends your client credentials to the token endpoint:
| Option | What it does | When to use it |
|---|---|---|
| Basic Auth Header | Sends Authorization: Basic {base64(clientId:clientSecret)} | Most providers — this is the default and the spec-recommended approach |
| Credentials in Request Body | Sends client_id and client_secret as POST body parameters | Some providers require this and will reject the Basic Auth header |
Header Prefix lets you change the word that appears before the token in the Authorization header. The default is Bearer (which produces Authorization: Bearer <token>). Most APIs use Bearer, but if your API expects something different — such as Token or DPoP — you can set it here.
Additional Parameters is a collapsible table where you can add any extra key-value pairs that your auth provider needs when requesting a token. Each parameter has three settings:
| Setting | What it means |
|---|---|
| Key | The parameter name — for example, audience, resource, or a custom name your provider requires |
| Value | The parameter value |
| Send In | Where Curlex should include this parameter: Request Body (the most common), Request Headers, or Query Params |
Each row also has a checkbox, so you can temporarily disable a parameter without deleting it — useful when testing different configurations.
Common examples:
| Provider | Key | Value (example) | Send In |
|---|---|---|---|
| Auth0 | audience | https://api.myapp.com | Request Body |
| Azure AD | resource | https://graph.microsoft.com | Request Body |
| Custom IdP | tenant_id | my-org | Request Body |
| Custom IdP | X-Custom-Header | some-value | Request Headers |
Callback URL: The default is https://localhost/callback. You can change this to any URL, but it must exactly match what you registered with the API provider's developer portal. When using the desktop OAuth flow, Curlex intercepts the redirect internally — the URL does not need to be a real server.
State parameter: Curlex generates a fresh random state value for every flow initiation to protect against CSRF attacks. You do not need to manage this manually.
Client Certificates (mTLS)
Some APIs — particularly internal enterprise services and financial APIs — require the client to present a TLS certificate in addition to (or instead of) API credentials. This is called mutual TLS (mTLS).
Client certificates are configured in Settings → Certificates, not in the Auth tab. This is because a certificate applies at the network connection level, before any HTTP headers are sent.
How to add a certificate:
- Open Settings (
Cmd/Ctrl ,) and go to the Certificates tab. - Click + Add Certificate.
- Enter the hostname this certificate should be used for (e.g.
api.internal.company.com). - Upload your certificate file — supported formats are
.pem,.p12, and.pfx. - If your certificate requires a passphrase, enter it.
- Save.
Once configured, Curlex automatically presents the certificate for any request to that hostname. No changes needed on individual requests.